This article uses iPhone screens to illustrate the typical steps of the Milo software update process.
If you ran into an issue while trying to update, go to this article: Milo update troubleshooting
Step 1 - Download the software update to Milo Link
Be sure to keep Milo Link up-to-date, and enable notifications
Never miss a Milo update to get the most out of your experience. Preview features need to be enabled in Milo Link and other features may not work as intended without the most recent Milo Link version.
If there is an update available when you open Milo Link and connect a Milo, you'll see a red banner at the top and a red update icon next to the Milo's name.
If you think there is an update but you don't see the notification, first close and reopen Milo Link, and reconnect the Milo.
Tap the update banner to start the download to your mobile. You'll see a red progress bar.
Make sure Wi-Fi is enabled and disconnect from any VPN you may be using.
Assuming you're on a good WiFi connection, the download is usually fairly quick.


Step 2 - Installing the new version on your Milos
Power up your all Milos so that you can update them all at the same rime.
Milos running on different software versions can not group together.
2a - Tap "Install now."
2b - Soon you'll see a permission request pop-up. "Allow" this, and tap "Join" if a pop-up requests access. Accept any other permission requests you see during the installation process.
Notice how Milo Link creates a local Wi-Fi network with each Milo during installation: this is why it's important to enable Wi-Fi on your mobile (while also disconnecting from your local at home/work network if the auto-connect to that Wi-Fi is interfering with your update process).


2c - The screen shows a progress bar. After some time you should see the progress bar starting to fill in. Depending on your network, it can take a few seconds or as much as a couple of minutes, so please be patient.
2d - Once installed, the Milo will reboot itself. Allow that to happen. You'll know the update is complete when you hear the familiar startup sound and greeting.


Update Milo Link
If you didn't check that you have the most recent version of Milo Link before starting the Milo update, do so now. Some new features may need you to enable them or change a setting in the app.
Quick troubleshooting tips
Detailed list of steps here: Milo update troubleshooting
- Delete Milo Link, then reinstall it.
- The installation process may stall due to network interactivity. If you see the screen below, tap either button. You're not actually using cellular data for this step since you have already downloaded the update. The process often picks up from where it halted. If it doesn't, simply start over.

If the screen appears several times and you can't move past it, check your local network connection:
Exit and close the Milo Link app. Don't reopen the app until you have made the changes you want to try from the list below:
-
- If you use a VPN, temporarily disable it.
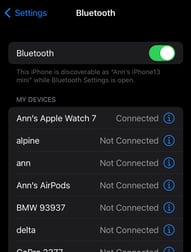
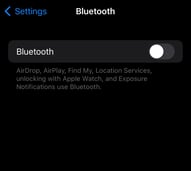
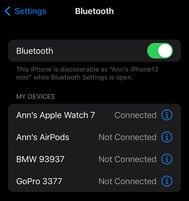
- In your phone's Settings, temporarily forget the Milo you are updating (tap the name of the Milo, then "forget"). Then, toggle Bluetooth off and back on at the top of that screen. No Milos should be listed.
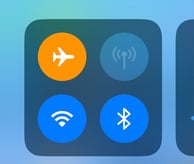
- If you are connected to a local network (very likely if you're at your home or office), temporarily disconnect from that network. Try setting your phone to airplane mode, then reenable Wi-Fi, avoiding reconnecting to your local network. If your usual network reconnects automatically, you may need to temporarily forget that network in your Settings.
Reopen Milo Link and try again.
Additional troubleshooting steps here: Milo update troubleshooting