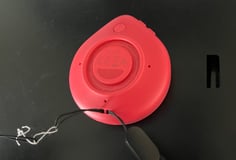
Milo arrives with one of the 3 enclosed lanyards already attached.
If you want to swap for another lanyard, you have options for how to do that:
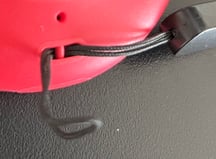
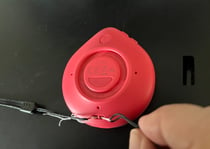
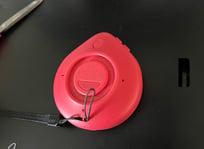
Method 1 The simplest way is to remove the old one, roll the small loop between fingers to make the loop pointier, then push it through the opening below the bar attach point. Pull the handle part through the loop to fasten. Depending on how stiff the lanyard loop is, this method can be tricky.
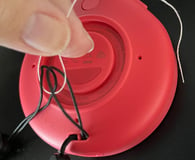
Method 2 On the attached lanyard, first undo the loop by pulling the lanyard handle through it, but do not pull it out completely.
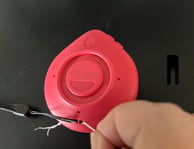
 Now take the lanyard you want to switch to, and loop its small lanyard around the just loosened small loop.
Slowly start pulling on the old lanyard handle so that its loop pulls the new loop along with it under the attach point bar. Once the new loop is through, unhook the 2 lanyard loops from each other and pull the new lanyard handle through the loop at secure in place.
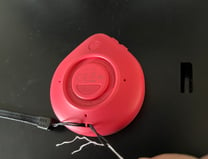
Method 3 If you want to swap it for one of the others, but have trouble getting the loop through the attach point, here are some tips:
- Before you start, find a piece of regular sewing thread. You don't need a lot, just long enough for you to comfortably tie it in a loop around 2 lanyard loops.
- On the attached lanyard, first undo the loop by pulling the handle through it, the same start as in Method 2.
- Before pulling out the lanyard loop fully, hoop the thread through it. Do the same with the loop on the lanyard you want to attach. Tie the thread securely to itself so that it forms a loop holding both lanyard attach loops.
- Start pulling the attached lanyard until the rest of that loop is freed from the attach point. As you do so, the thread should pull the new lanyard loop along towards the attach point.
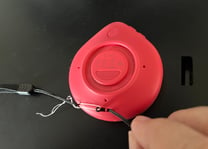
- Continue pulling until the new lanyard loop is a good way through the attach point. Cut the thread and discard it.
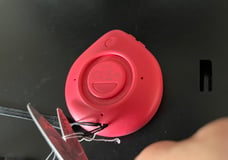
- Finish by looping the new lanyard handle through the attach loop to secure it to the Milo.

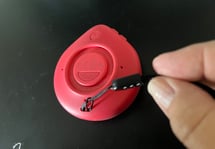
Note: There is a tiny hole in the attach point cavity that is part of a valve. A pin prick could affect the function of this valve. For this reason, we do not recommend using sharp objects to push the loop through the attach point, and why we suggest this thread-approach.